
The Framework greatly simplifies the source code implementation and provides an abstraction layer to easily access data and execute data related operations. It becomes even more powerful when combined with LINQ.
This first part provides all steps necessary to configure a project for using the ADO.NET Entity Framework. Future parts will cover more advanced topics.
The download for Visual Studio .NET 2008 SP1 can be found here:
http://msdn.microsoft.com/en-us/vstudio/products/cc533447.aspx
The example is done using the AdventureWorks DB that can be downloaded from here:
http://www.codeplex.com/MSFTDBProdSamples/Release/ProjectReleases.aspx?ReleaseId=4004
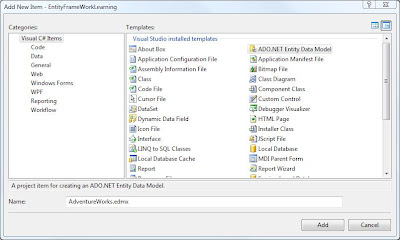
- Add a new item of type ADO.NET Entity Data Model to your existing project.
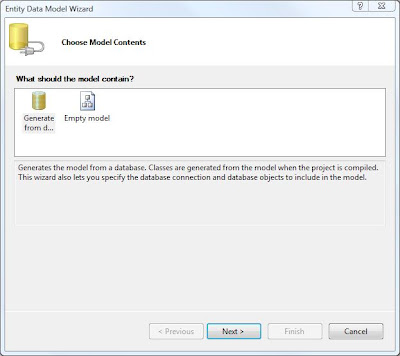
- A wizard will be displayed in which you may either select to generate the model out of an existing DB or to generate a blank model that you may separately map to a DB (select generate from a DB for the example).
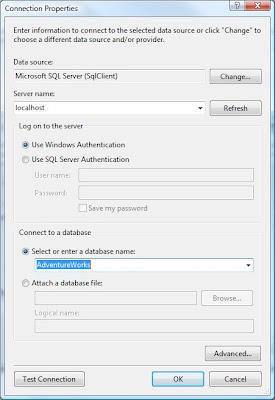
- Select your data source for the data connection and select the DB you want to make available (select SQL Server and AdventureWorks DB for the example).
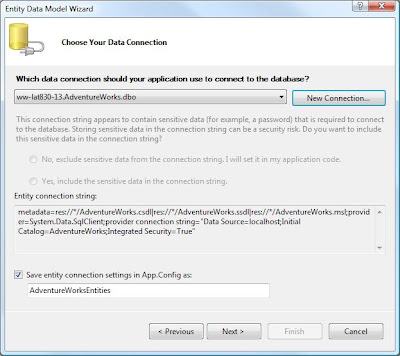
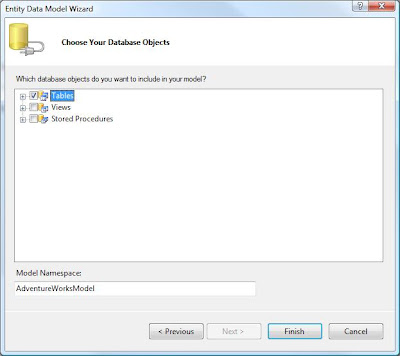
- Accept the suggested configuration and select the DB objects that you want to make available (select only tables for the example).
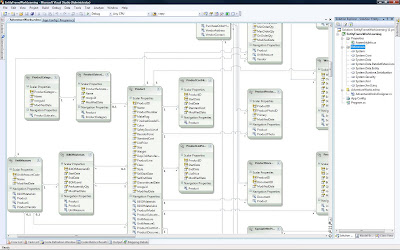
- The necessary files, references and data structures are now created and linked automatically. The file "AdventureWorksDesigner.cs" contains the auto-generated classes in this example. The App.Config file contains the connection string to the DB. The project is now prepared for the use of the Entity Framework!


No comments:
Post a Comment